Products You May Like
The front squat is one of the most fundamental, functional, and yet commonly-overlooked lower body exercises. It develops strength, power, conditioning, and leg size while reducing lower back stress compared to other squat variations. Despite its benefits, many lifters mistakenly consider front squats “too advanced” for beginners or, worse yet, merely a lesser alternative to the classic back squat.
Despite the confusion surrounding the front squat, it’s actually pretty easy to learn. With a few cues and some confidence, you can make this movement a cornerstone in your workouts. In this guide, we’ll show you how to nail the front squat and how to place it, well, front and center in your program.
- How to Do the Front Squat
- Front Squat Mistakes to Avoid
- Benefits of the Front Squat
- Muscles Worked by the Front Squat
- Who Should Do the Front Squat
- How to Program the Front Squat
- Front Squat Variations
- Front Squat Alternatives
- Frequently Asked Questions
Front Squat Technique Video
Traver Boehm explains and demonstrates basic front squat technique in this quick video. In just about 100 seconds, learn everything you need to know about the front squat. Then finish the article and learn even more.
How to Do the Front Squat
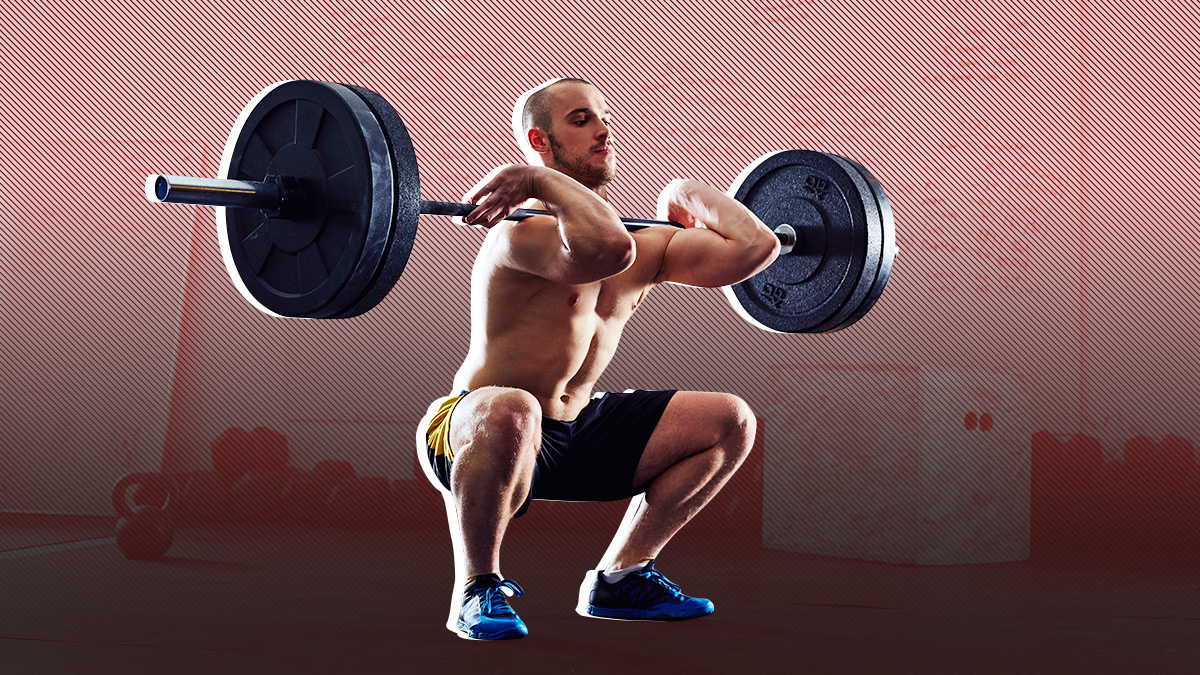
The front squat is pretty straightforward. You perform a deep squat while holding a barbell positioned across the front of the shoulders. The position of the bar affects your leverage and torso angle during the movement. This unique posture influences muscle recruitment and requires more work from your upper back, core, and lower body.
Step 1 — Get Under the Bar
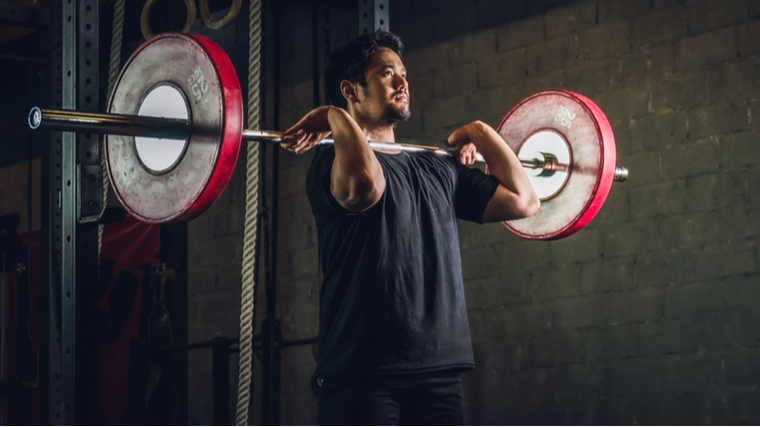
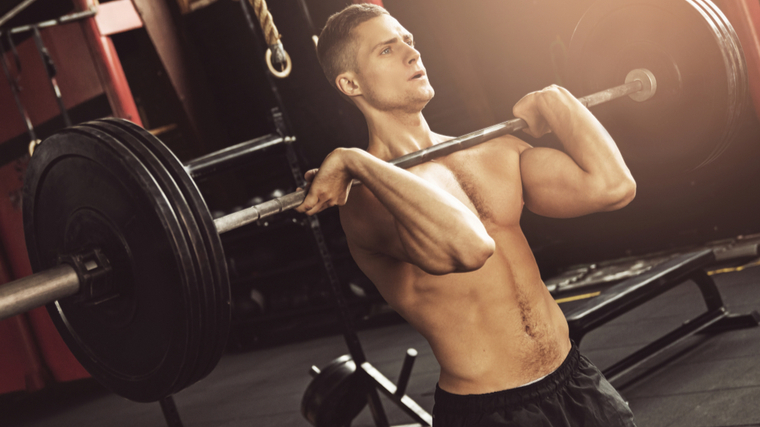
Place the barbell in a squat rack at roughly upper-chest height (slightly below your collarbones), then bend at the knees until the tops of your shoulders are just below the bar. From here, grab the bar with an outside-shoulder-width grip and get into what’s known as the “rack position.”
The bar is supported on the front of each shoulder, under the chin and nearly touching the throat. Take hold of the bar and bend your arms until your elbows are aimed forward. The palms of both hands should end up pointed towards your face, with your fingers helping to keep the bar in place. The shoulder blades are retracted and the upper back is tense. The elbows should point forward or slightly upwards during each rep, never down.
Shoulder, elbow, and/or wrist mobility restrictions may prevent ideal arm position. This is a fairly common issue and we’ll later review some grip options to allow effective front squats (while you work on fixing those mobility problems, right? Right).
Form Tip: The rack position may be uncomfortable for some lifters, particularly with the bar contacting the collarbones. Rather than using a common bar pad as cushioning (which essentially thickens the bar and increases the likelihood of choking yourself), actively tense the shoulders to create a “muscle shelf” and take stress off any pointy bones. Your body will adapt to the stress quickly and the discomfort will soon become a non-issue.
Step 2 — Walk the Weight Out
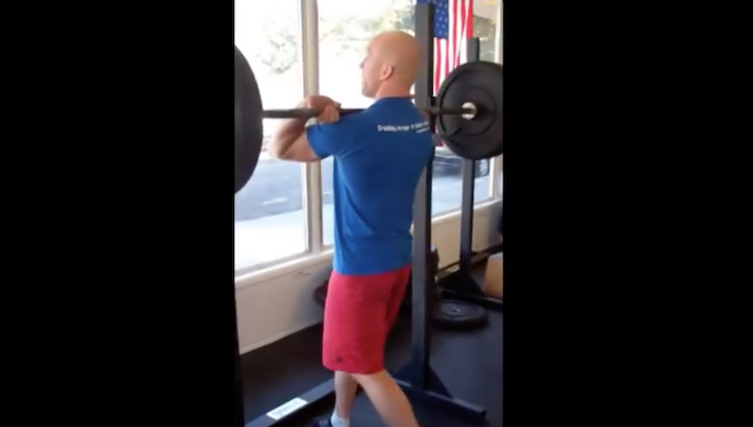
With the bar securely in the rack position, it’s time to finish the setup. Engage and flex your upper back, core, and glutes before straightening your legs to lift the bar from the squat rack.
As the weight settles into position, take a moment to stabilize your entire body before taking a small step backwards with one foot, matched by the other foot, followed by one small step sideways to set your feet at a comfortable width.
Form Tip: Once you’ve set your stance, don’t fidget. Many lifters tend to shuffle their feet, wiggle their toes, or “squash cigarettes” in a little dance before beginning a set of squats, but it only prolongs the time you’re standing there holding a loaded barbell and may lead to excessive ankle or knee strain as you shift support from one leg to the other.
Avoid the bad habit of wasting time and energy (in squats, in the gym, and, really, anytime). As you gain experience, you’ll instinctively learn your individual best squat stance and the walkout will quickly become second-nature — unrack bar, set stance, get to work.
Step 3 — Squat Down
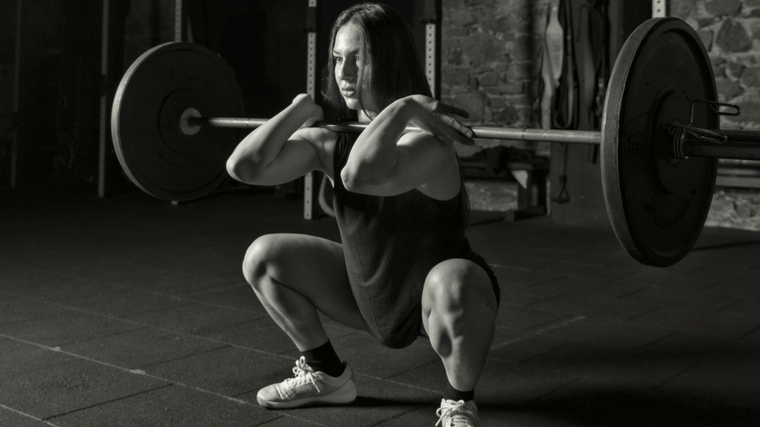
With the bar in position, it’s time to squat. Keep the elbows aimed at the imaginary horizon line or above, while bending the legs until you’ve reached the desired depth. As a general rule, aim to squat below parallel, or with the hip joint below the knees. This range of motion provides an effective balance of muscle-building (hypertrophy), strength-building, and overall mobility.
Front squats allow the torso to remain more upright, so it’s generally “easier” and more intuitive for most people to reach a deep squat position. You may need to fine-tune your stance width and foot position, but front squats are typically performed with a relatively closer stance compared to back squats.
If your body is still unable to reach significant depth while maintaining good upper body position, there may be hip or ankle mobility issues which require more direct attention.
Form Tip: The front squat is self-correcting in the sense that if you lower the elbows any significant degree, you’re going to immediately be pulled out of position and will almost certainly drop the bar.
If you feel strain in the lower back, shoulders, or elbows, it’s a sign that you may be allowing the arms to drop as you descend. Stop that. Imagine a pair of rubber bands pulling your elbows up to the ceiling throughout the set as a constant cue to be leading with the elbows.
Step 4 — Stand Up
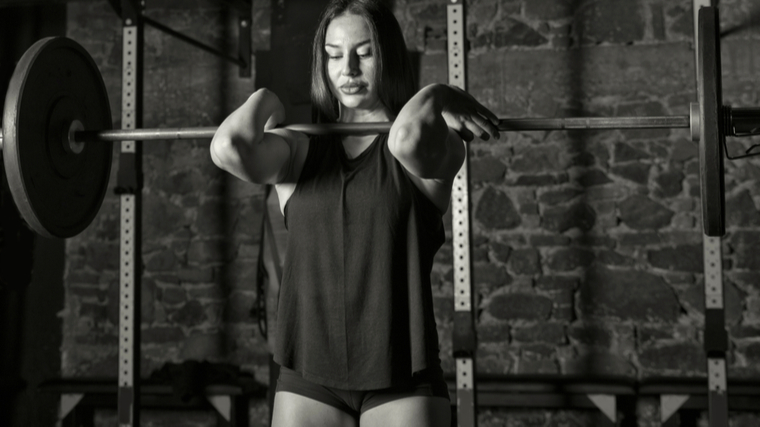
After you’ve reached the bottom, it’s time for the real work — getting back up. Keeping your elbows up, stay flat-footed and press your entire body back to standing. It’s critical that your hips and shoulders rise at the same pace. If your hips come up first, your upper body (and therefore your elbows) will tip forward out of position.
Ensure that your knees don’t buckle inwards or wobble outwards as you rise. If they do, adjust your stance width and reduce the weight on the bar until you can maintain a strong knee position, roughly in the same plane as the ankles.
Form Tip: Bouncing out of the bottom position to build momentum is one of the least effective and most dangerous ways to train the squat. Because the front squat facilitates a deeper range of motion, you may feel tempted to quickly drop and rebound up. Resist the urge and focus on applying muscular force which translates into building more strength and size.
Front Squat Mistakes to Avoid
While front squat technique may be relatively simple, there are a handful of common errors which can be counterproductive and slow down progress.
Range of Motion
The cardinal sin of all squats: quarter reps. Partials. Squatting high. Call it what you will, but one of the key advantages of front squats is the ability to reach parallel or below without leaning the upper body forward, which is what shifts stress to the lower back.
While squatting to a variety of depths can have its place (competitive powerlifters, for example, only need to reach parallel, with their hips in line with their knees and not below), squatting to lower depths has been shown to build more leg size and strength compared to squatting higher. (1)
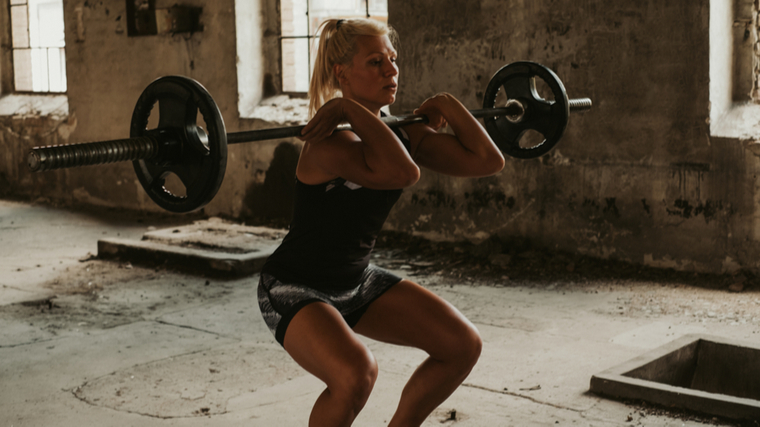
While the phrase “ass to grass” is often used as a colorful, though not necessarily helpful, guideline, aiming to reach just-below parallel is a more practical goal for the majority of lifters. When viewed from the side, your hip bone should end up slightly below your kneecap and the thigh should have a slight downward angle.
Avoid it: It comes down to intention and self-awareness. If you start the set intending to reach a certain depth, then know whether you reached it or not. If you wanted to squat below parallel and ended up with reps above parallel, you did something wrong.
If you wanted to squat high because it’s goal-appropriate and you nailed it on each rep, then it was a good set. Quarter-rep front squats with heavy weight, for example, can be a surprisingly effective technique to build core strength. The key issue is about maintaining consistent depth from rep to rep and using each set to get closer to your intended goal, not using poor technique to make training easier.
Elbows Pulling the Body Down
Elbow position plays an important role in front squat technique. Keeping the bar in proper position means your upper back is fully engaged, your core is tight, and your body is aligned for optimal power output. If the elbows point down, you’ll initiate an avalanche of potential technique errors. Inefficient training and potential injury follow soon after.
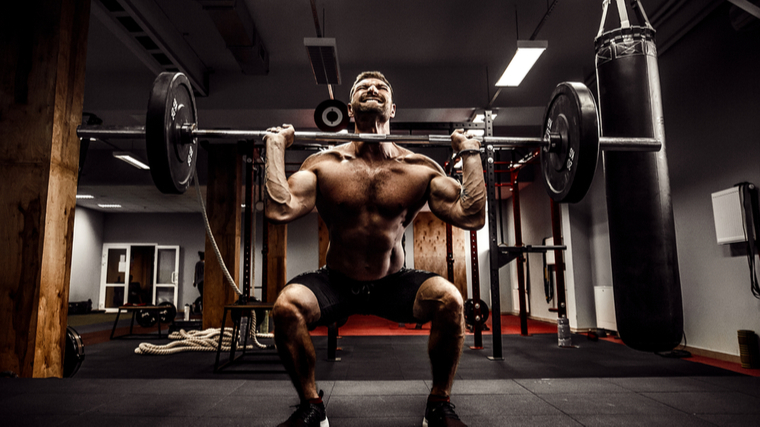
Avoid it: The “rubber bands from the ceiling” cue mentioned earlier is a simple and reliable way to remind yourself to keep the elbows high. Increasing your body awareness is another overlooked technique. If you feel stress in your forearm or biceps muscles, there’s a good chance the bar is out of position and you’re supporting the weight with your arm muscles instead of your locked-in shoulders and upper back.
Knee Shift
Wobbly knees should only happen on the walk to the car after leg day, not during the middle of a rep. Your knees should stay generally in line with your ankles during the exercise and when transitioning from the bottom position back up to lockout. Allowing the knees to cave in (sometimes called knee valgus) or shift out encourages knee instability and increases the chance of an injury.
Avoid it: The most direct solution is one you may not want to hear. Lighten the weight because it’s too heavy. Knee movement, particularly caving in, is often due to a muscle imbalance and/or weak glutes. That imbalance is causing a series of muscles to compensate, which is forcing the knee joint into a variety of unexpected and less-than-ideal positions.
Leaning Forward
Because the barbell is held close in line with the body’s center of gravity, front squats allow (and actually require) lifters to keep an upright torso during the movement. It’s a key point in creating maximal core engagement for a stable torso.
Experienced lifters more familiar with low-bar back squatting may instinctively lean forward, particularly during the concentric (up) portion, but leaning forward is a big no-no that negates the front squat’s low-back sparing benefits without improving leverage or strength. That’s lose-lose.
Avoid it: Cue the broken record cliche: Keep. Your. Elbows. Up. You cannot lean forward while keeping your elbows in the correct position. It’s just not anatomically possible. When you lean forward, your elbows go towards the ground and vice versa, so it’s a two-for-one solution.
Benefits of the Front Squat
The front squat allows you to load the lower body with significant weight without overstressing the lower back. Many lifters who have recurring lumbar pain from years of heavy back squatting find they’re able to continue hard leg training by switching to front squats.
Due to the shifted load position and increased core strength, front squats are also a staple in athletic-based workouts to build strength, speed, and power. Bodybuilders rely on front squats because of the increased quadriceps activation and hypertrophy (muscle size), while CrossFitters and Olympic weightlifters use front squats as sports-specific training, because the movement is required in their competitions.
Lower Back Safety
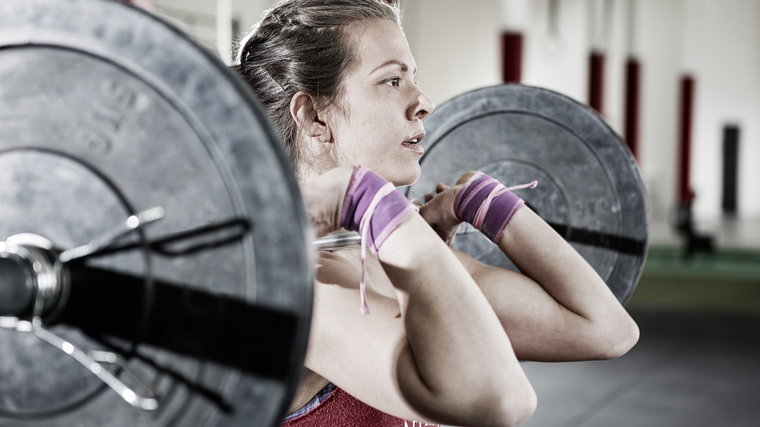
“I can’t squat today, my back hurts” is one of the all-time excuses for skipping leg day and, while it may occasionally be accurate, it’s more often easily ignored when you recognize that front squats place less stress on the lumbar spine, hips, and knees, (2)(3) as well as requiring increased abdominal tightness, which combine to promote a safe situation for the joints without compromising the overall training stimulus.
Increased Leg Size
Back squats are typically known for promoting glute and hamstring size, or “overall leg mass.” Front squats, comparatively, significantly increase quadriceps activation due to body position and leg leverage, making them a popular choice for bodybuilders looking to target the largest leg muscles.
Athletic Strength and Conditioning
Any effective strength and conditioning program for athletes will maximize results while minimizing risk, since an injured player doesn’t make it onto the field on game day.
For this reason, front squats are often preferred in athletic programs to train lower body strength and power without exposing the athletes to undue risk. The increased upper back and core strength are an added benefit, as they carryover to speed, agility, and durability in all sports.
Sport-Specific Training
While the front squat may appear to be a somewhat awkward lift, it’s extremely sport-specific for Olympic weightlifters and CrossFit athletes, both of whom perform the movement in competitions; Olympic lifters during the clean & jerk, and CrossFit athletes during a countless number of events.
Improving the front squat on its own has direct carryover to improving performance in these sports. Ignoring the front squat in training would be like a basketball player ignoring 3-pointers in practice.
Muscles Worked by Front Squats
The front squat is primarily a leg exercise, but multiple muscles of the upper body are required to stabilize the bar and provide support during the exercise.
Legs
The front squat, like any basic squat movement, works the quadriceps, hamstrings, and glutes. While some studies offer mixed data regarding increased quadriceps activation, an abundance of anecdotal evidence (decades-worth of bodybuilders and general lifters) have found front squats to target the quads (the front of the thighs) significantly more than many other squat variations. (4)
Upper Back
Stabilizing the bar in the rack position requires consistent work from the entire upper back including the trapezius, rear deltoids, and rhomboids.
Because these muscles are worked isometrically (not stretching/contracting throughout each rep), it’s not uncommon to feel soreness in the area after training front squats. Muscle soreness isn’t always an indicator of progress but, in this case, it’s a sign that you were most likely fully engaged and using solid technique.
Abdominals
The upright torso during front squats and the position of the load relative to the core muscles (abs and lower back) increase the stress on the abdominal wall, providing greater stability demands and requiring a significant amount of work to support the load.
Similar to the upper back, it’s not uncommon to have some ab soreness after several sets of heavy front squats. And, like the upper back, it simply means you were engaging your core properly.
Who Should Do the Front Squat
The front squat is a versatile exercise, easily learned and applicable to a number of goals. No lifter should shy away from practicing this useful lift.
Training for Muscle
Lifters seeking increased leg size should make the front squat a staple, or at least a regularly recurring movement, in their workouts. The muscle recruitment, range of motion, and overall muscle-building stimulus provide a significant and unique muscular stress compared to other exercises.
Training for Strength
Lifters looking to develop total-body strength can benefit from the front squat and its ability to blend lower body strength with upper body stability. Strength athletes including powerlifters, competitive strongmen/strongwomen, CrossFitters, and Olympic weightlifters can use front squats either as accessory work to support other lower body training or, as previously addressed, a sport-specific movement.
Training for Sport
Any athlete in any sport can benefit from getting stronger and faster, and front squats can be a key player in building those attributes without exposing the athlete to excessive wear and tear.
How to Program the Front Squat
The front squat can be programmed with a number of set/rep schemes to accommodate a number of goals.
Heavy Weight, Low Repetition
To prioritize strength, a time-tested approach would be three to five sets of three to five reps, using a weight that reaches near-muscular failure on each set. Long rest periods, up to several minutes between sets, ensures minimum fatigue and maximum power output.
Moderate Weight, Moderate Repetition
To build leg size, a classic bodybuilder’s method of three to four sets of eight to 12 reps is optimal, reaching muscular failure at the last rep of each set. This is the type of gut-busting workout that makes lifters dread leg day, until the new-found gains make the effort worthwhile.
Important to note, it’s sometimes suggested to avoid very high repetitions (15 to 20+) with front squats, due to the static contraction of the upper back. The idea being that cumulative fatigue in the relatively smaller muscles of the upper back will impair the lifter’s ability to maximally fatigue the much larger legs.
This idea is debatable, at best, and should be taken with a generous grain or two of salt. If you want to grind out two sets of 15-20 rep front squats to see how your body handles the challenge, then attack it and experiment. There’s a good chance your lungs and conditioning, not your upper back, will be the limiting factor there.
Moderate Weight, Low Repetition
To build explosive power and speed, front squats work extremely well with submaximal weights moved at fast speeds without sacrificing form. Six to eight sets of two to four reps, using a weight that’s nowhere near muscular failure. This can be a phenomenal way to train athletes or lifters who want to move like athletes.
Front Squat Variations
The front squat can be achieved by any lifter regardless of their current ability or experience. The key, as with any exercise, is to maintain proper technique while adjusting as little as needed to accommodate any physical restrictions or strength discrepancies.
While the front squat itself can be a useful training tool, some simple adaptations can make the movement more or less challenging without any special programming required.
Front Squat to Box
While the front squat does permit a lifter to reach a deep squat position, not all lifters are physically prepared to sink into a deep squat. Depending on the lifter’s height, either a standard size bench/box or a series of mats or aerobic steps can be used as a target.
Do not slam down onto the surface, as the impact would increase stress on the hips and spine. Pretend that you’re sitting on bubble wrap and trying to not pop any bubbles. The goal is feedback, not rest. Descend until the glutes or hamstrings make contact, and then maintain position and rise immediately under control.
Pause Front Squat
Once a lifter is confident with standard front squats, the simplest way to increase challenge is to spend more time in the bottom position. This serves dual purpose to improve both strength, since the “stretch-shortening cycle” is reduced (a technical term where a muscle can “store” strength if stretched and contracted quickly), and improve mobility since spending time in the bottom of a squat can increase hip and ankle mobility.
It’s important not to relax the body in the bottom position. Maintain tension and muscle engagement throughout the pause and be ready to rise at any moment. Hold the bottom of the squat for one to three seconds.
Front Rack Lunge
Lunges are, essentially, single-leg squats. Performing any lunge variation with the bar in the rack position (as you would for the front squat) is an incredible way to challenge total-body stability and focus on building strength in one leg at a time.
These can be done statically in a split stance, stepping forward and returning upright each rep, stepping backward in a reverse lunge, or the most intense variation as walking lunges for total distance or time.
Front Squat Alternatives
The front squat has many benefits, but there are a handful of exercises that deliver comparable results and may, depending on any number of scenarios, offer unique benefits of their own.
Goblet Squat
While front squats are done using a barbell across the front of the shoulders, holding a kettlebell or single dumbbell in the hands at a similar position (at chest-level, under the chin) can offer many of the same benefits — an upright torso position, greater depth and range of motion, increased upper back activation, and decreased lower back stress.
Because kettlebells and dumbbells are more commonly found in very light weights, while barbells are rarely found below 45 pounds, goblet squats can be extremely useful for inexperienced lifters, as well as much younger or much older athletes for whom 45 pounds may be excessive.
High-Bar Back Squat
Shifting the barbell to the back while adjusting its placement higher on the neck/traps alters leverage and allows a similarly upright torso as seen in front squats. It also has more direct carryover for powerlifters, in particular, since the bar is supported through the arms, shoulders, and upper back in a much more similar position to their competitive lift.
Trap Bar Squat
Sometimes called a trap bar deadlift, this can be an extremely effective way to train the legs with minimal lower back stress. Holding a trap bar in the hands clearly increases the grip strength requirement of the lift, but because the weight is held close in line to the body’s center of gravity (as with a front squat), overall joint strain is significantly reduced.
FAQs
Do I ‘need’ to front squat if I’m already training the back squat?
While the answer technically depends on a number of variables (your specific training goal, overall workout plan, specific injuries or conditions, etc.), the short answer is, no, you don’t “need” to include both types of squats in your program at the same time.
You also don’t “need” to keep both flathead and Phillips-head screwdrivers in your toolbox, but you should realize they’re similar tools that serve different purposes, they’re not entirely interchangeable, and you may eventually want to use one to achieve something the other can’t provide.
The rack position is still uncomfortable. What should I do?
First, work on mobility in and around the joints giving the most problem whether it’s the shoulder, elbow, or wrist. Simply holding the bar and easing your way into the rack position itself until you reach the limit of your individual range of motion, and then holding that basic stretch for several sets of several seconds, is one effective approach.
As an alternative, there are two common work-arounds to the rack position. The first is to secure basic lifting straps around the bar as “handles.” This effectively reduces the range your arm needs to bend and allows a neutral grip (knuckles towards face) instead of the more flexible palms-up rack position, which drastically reduces the mobility requirement.
It’s still important to focus on keeping the elbows high while holding the straps, as the altered hand position may trick you into a more passive posture.
The second solution is to use a cross-arm, sometimes called California-style, grip. This allows the weight to be held in position not only by the front of your shoulders and fingers, but by the forearms, elbows, upper arms, and entire hand.
This grip is much more popular with bodybuilders, as it requires significantly less shoulder mobility and allows heavier weights to be used due to the increased support. The biggest compromise is that the bent-arm position doesn’t allow optimal upper back engagement, so there’s less athletic carryover and more direct leg-training focus.
Now You Know (Front) Squat
You’ve learned the why, when, and most importantly the how. It’s time to add the under-appreciated front squat to your arsenal of lower body workouts. Your leg size, upper back strength, core stability, and lack of lower back pain will thank you. But please, for the sake of all things sacred in the gym, remember to keep your elbows up.
References
-
Kubo K, Ikebukuro T, Yata H. Effects of squat training with different depths on lower limb muscle volumes. Eur J Appl Physiol. 2019 Sep;119(9):1933-1942. doi: 10.1007/s00421-019-04181-y. Epub 2019 Jun 22. PMID: 31230110.
- Yavuz, Hasan & Erdag, Deniz & Amca, Arif & Aritan, Serdar. (2015). Kinematic and EMG activities during front and back squat variations in maximum loads. Journal of sports sciences. 33. 1-9. 10.1080/02640414.2014.984240.
- Gullett, Jonathan C; Tillman, Mark D; Gutierrez, Gregory M; Chow, John W A Biomechanical Comparison of Back and Front Squats in Healthy Trained Individuals, Journal of Strength and Conditioning Research: January 2009 – Volume 23 – Issue 1 – p 284-292 doi: 10.1519/JSC.0b013e31818546bb
- Coratella, G., Tornatore, G., Caccavale, F., Longo, S., Esposito, F., & Cè, E. (2021). The Activation of Gluteal, Thigh, and Lower Back Muscles in Different Squat Variations Performed by Competitive Bodybuilders: Implications for Resistance Training. International journal of environmental research and public health, 18(2), 772. https://doi.org/10.3390/ijerph18020772
